
https://github.com/Xiaojiu-z/EasyControl
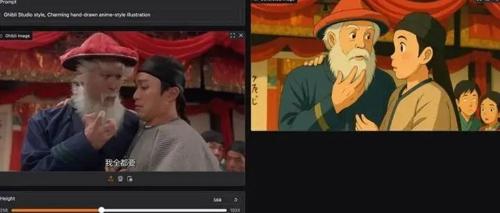
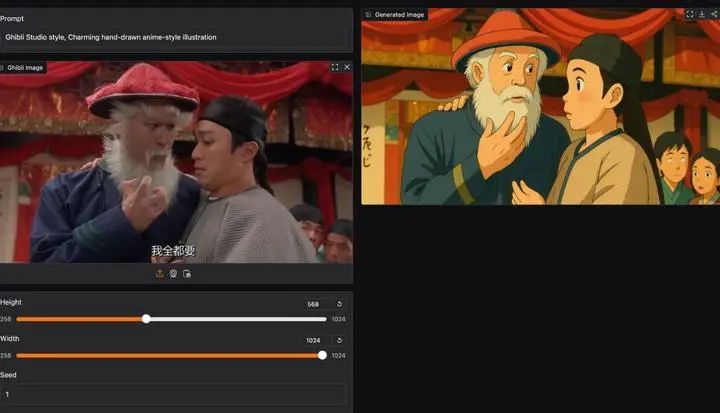
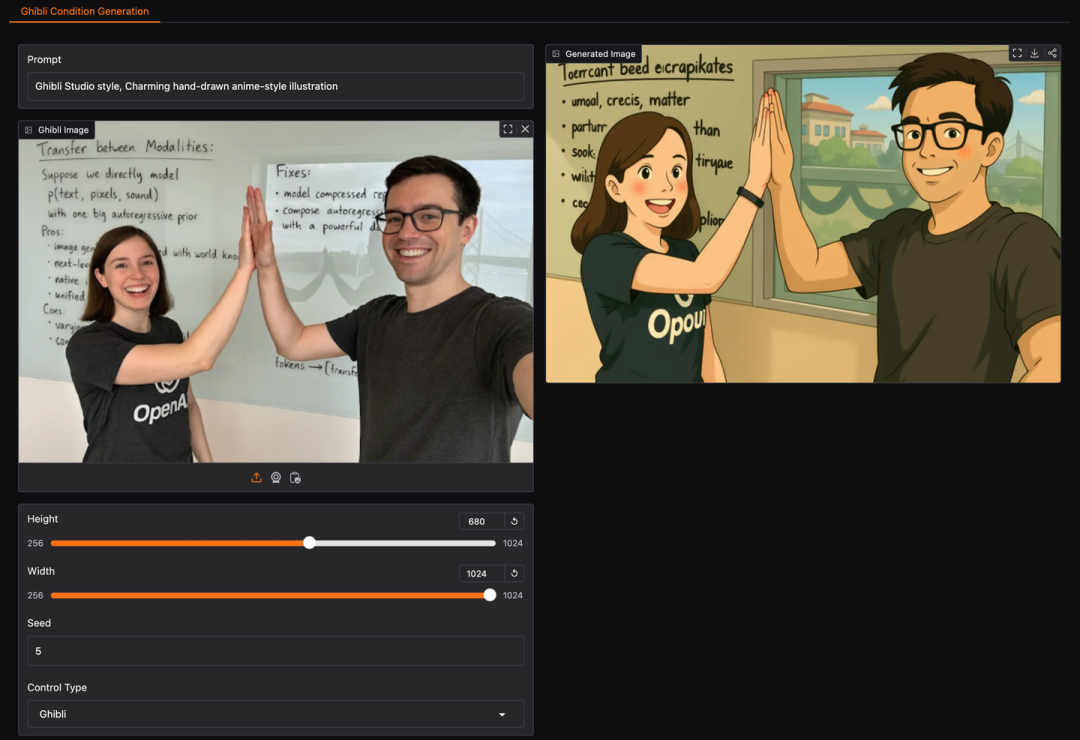
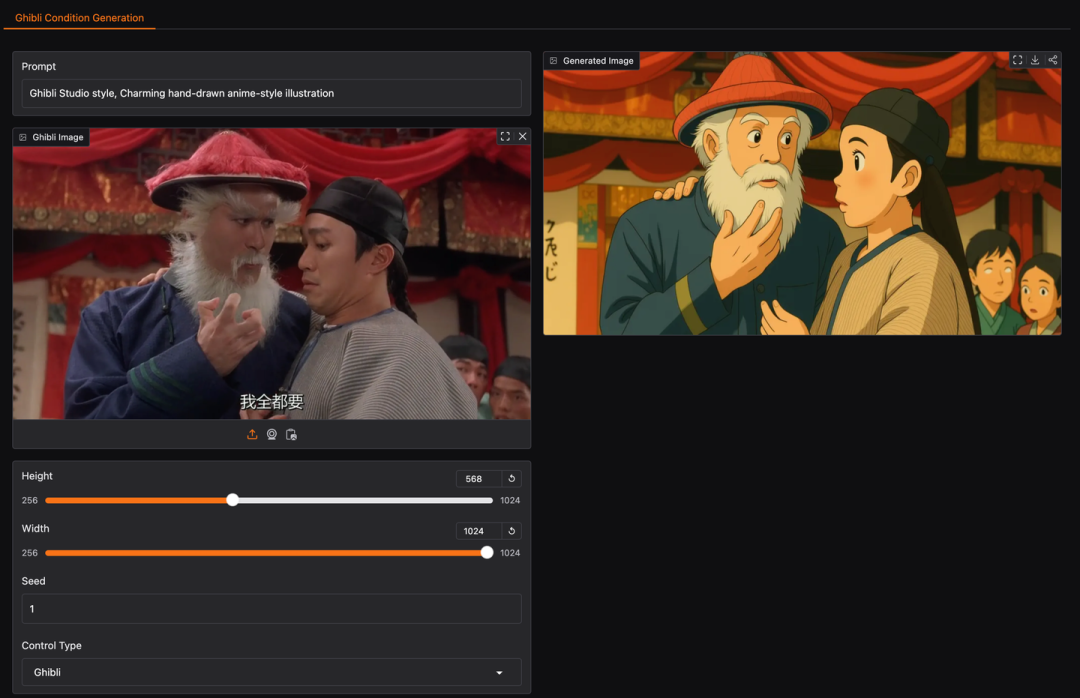
今天在github上看到一个简易复现GPT 4o转吉卜力风格的工具,开发者来自上海科技大学、新加坡国立大学,项目作者名是Xiaojiu-z(小舅子?!)。
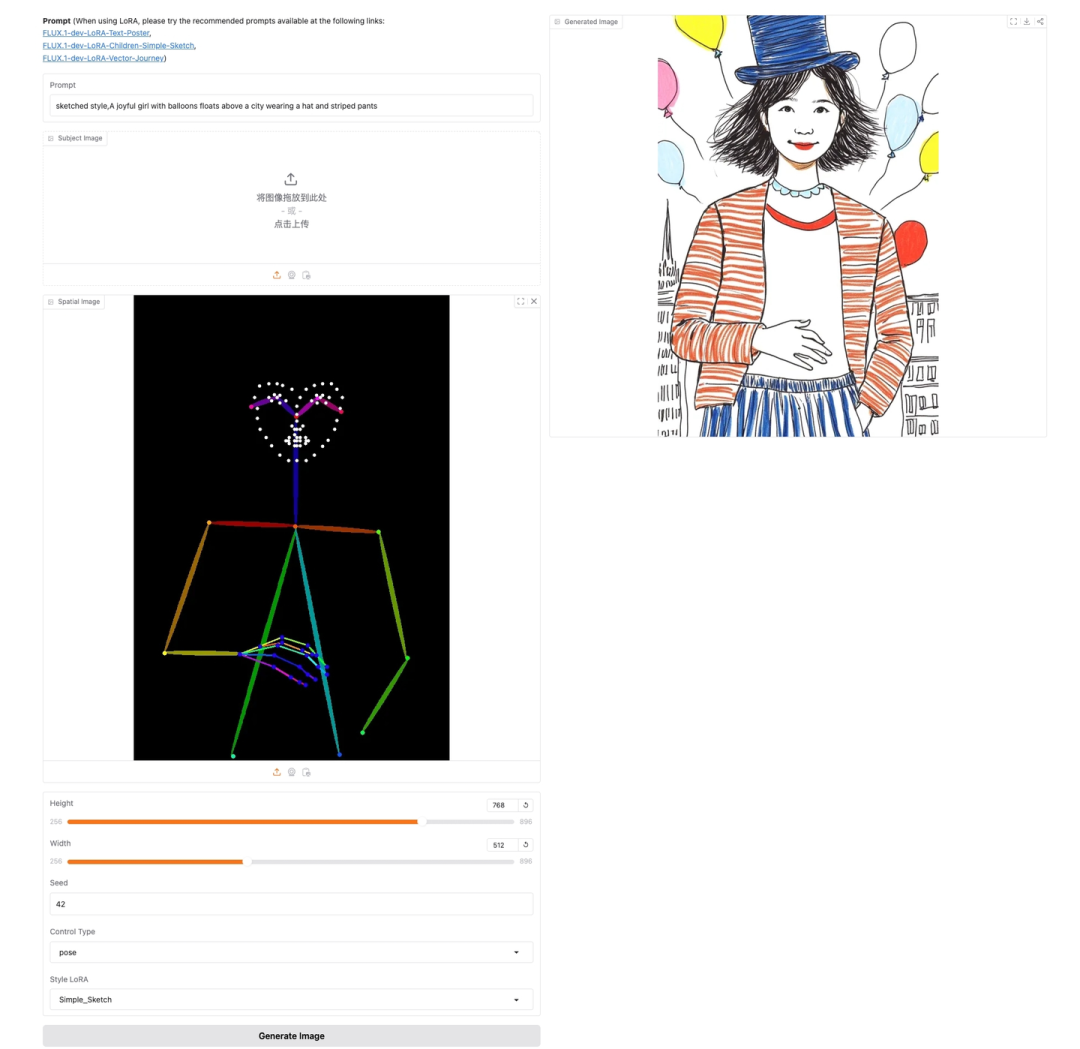
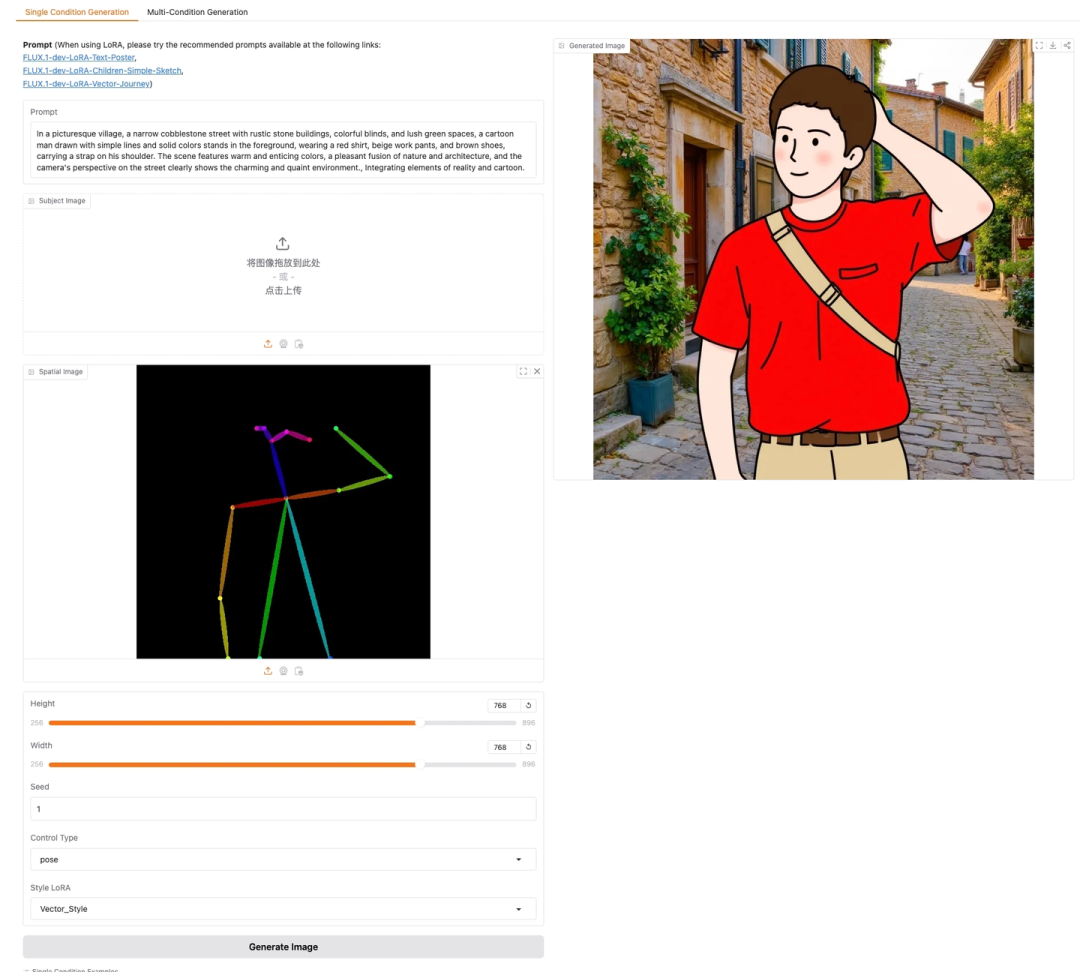
当然了,它不仅仅是支持一键转吉卜力风格,还支持类似ControlNet的功能。
目前暂时还不支持comfyUI(应该很快)。
EasyControl:为扩散变换器添加高效灵活的控制
an class=”nolink”>张宇轩 、<span class=”nolink”> 袁一芮 、<span class=”nolink”> 宋一任 、<span class=”nolink”> 王浩帆 、<span class=”nolink”> 刘家铭
Tiamat AI、上海科技大学、新加坡国立大学、 Liblib AI
特性
- 动机:
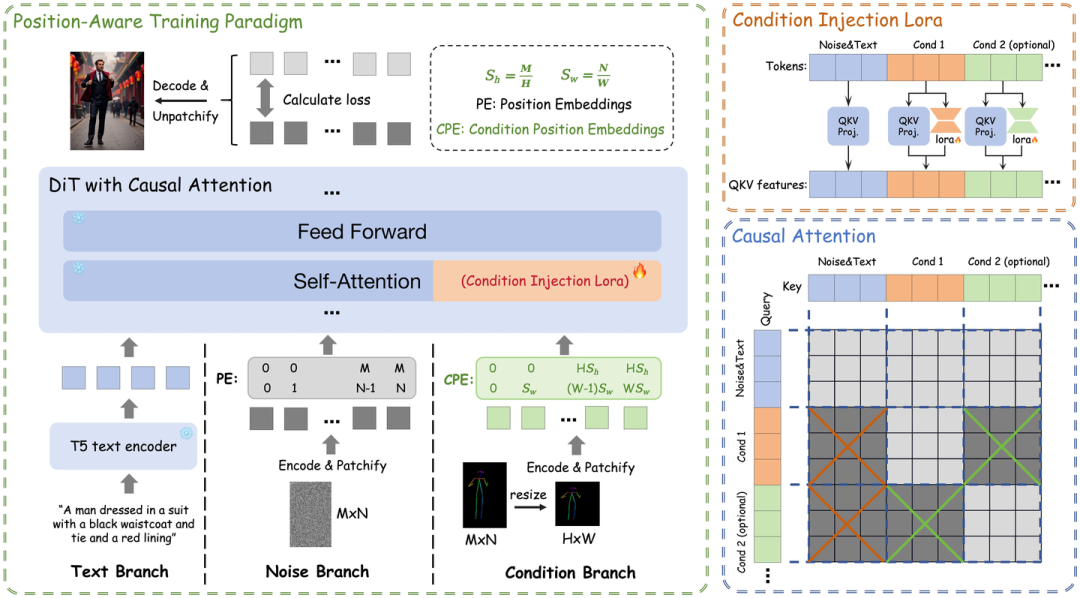
扩散模型的架构正从基于 Unet 转向 DiT(扩散变换器)。然而,DiT 生态系统缺乏成熟的插件支持,并面临效率瓶颈、多条件协调冲突和模型适应性不足等挑战。 - 贡献:
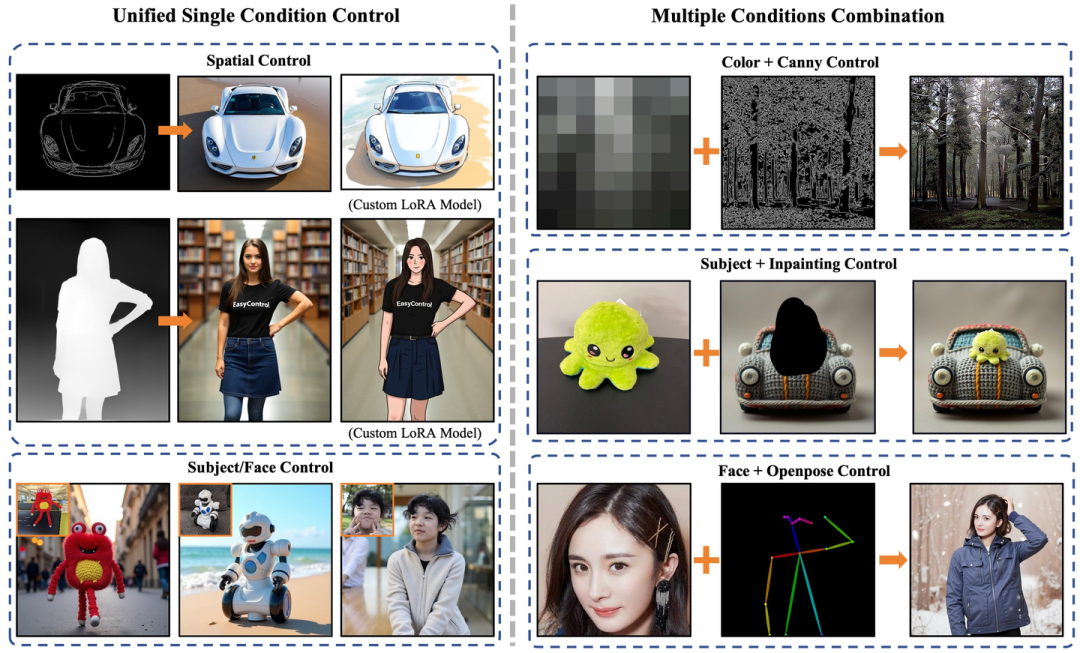
我们提出 EasyControl,一个高效灵活的统一条件 DiT 框架。通过引入轻量级条件注入 LoRA 模块、位置感知训练范式,以及结合因果注意力机制与 KV 缓存技术,我们显著提升了模型兼容性 (实现即插即用与无损风格控制)、 生成灵活性 (支持多分辨率、宽高比及多条件组合)和推理效率 。
动态
- 2025-03-12
: ⭐️ 推理代码已发布。待确认所有功能运行无误后,新模型将合并至本仓库。敬请关注更新! - 2025 年 3 月 18 日
: 我们已在 Hugging Face 发布ass=”nolink”>预训练模型检查点 !您现在可以使用官方权重体验 EasyControl。 - 2025 年 3 月 19 日
: 我们上线了 Hugging Face 演示空间 !您现在可以通过 Hugging Face 空间体验 EasyControl,尽情享用吧!
- 2025 年 4 月 1 日
: 全新风格化图生图控制模型正式发布!!通过此 LoRA 模型可将人像转化为吉卜力工作室风格的艺术作品。该模型仅使用 100 张真实亚洲人脸数据训练,并搭配 GPT-4o 生成的吉卜力风格对应图像 ,在保留面部特征的同时完美呈现标志性动漫美学。
安装
推荐使用 Python 3.10 及支持 CUDA 的 PyTorch。环境配置步骤如下:
# Create a new conda environment
conda create -n easycontrol python=3.10
conda activate easycontrol

# Install other dependencies
pip install -r requirements.txt
下载
您可以直接从 Hugging Face 下载模型,或使用 Python 脚本下载:
from huggingface_hub import hf_hub_download
hf_hub_download(repo_id="Xiaojiu-Z/EasyControl", filename="models/canny.safetensors", local_dir="./")
hf_hub_download(repo_id="Xiaojiu-Z/EasyControl", filename="models/depth.safetensors", local_dir="./")
hf_hub_download(repo_id="Xiaojiu-Z/EasyControl", filename="models/hedsketch.safetensors", local_dir="./")
hf_hub_download(repo_id="Xiaojiu-Z/EasyControl", filename="models/inpainting.safetensors", local_dir="./")
hf_hub_download(repo_id="Xiaojiu-Z/EasyControl", filename="models/pose.safetensors", local_dir="./")
hf_hub_download(repo_id="Xiaojiu-Z/EasyControl", filename="models/seg.safetensors", local_dir="./")
hf_hub_download(repo_id="Xiaojiu-Z/EasyControl", filename="models/subject.safetensors", local_dir="./")
hf_hub_download(repo_id="Xiaojiu-Z/EasyControl", filename="models/Ghibli.safetensors", local_dir="./")
若无法访问 Hugging Face,可通过 hf-mirror 下载模型:
export HF_ENDPOINT=https://hf-mirror.com
huggingface-cli download --resume-download Xiaojiu-Z/EasyControl --local-dir checkpoints --local-dir-use-symlinks False
用法
以下是使用 EasyControl 的基础示例:
模型初始化
import torch
from PIL import Image
from src.pipeline import FluxPipeline
from src.transformer_flux import FluxTransformer2DModel
from src.lora_helper import set_single_lora, set_multi_lora

def clear_cache(transformer):
    for name, attn_processor in transformer.attn_processors.items():
        attn_processor.bank_kv.clear()

# Initialize model
device = "cuda"
base_path = "FLUX.1-dev"  # Path to your base model
pipe = FluxPipeline.from_pretrained(base_path, torch_dtype=torch.bfloat16, device=device)
transformer = FluxTransformer2DModel.from_pretrained(
    base_path,
    subfolder="transformer",
    torch_dtype=torch.bfloat16,
    device=device
)
pipe.transformer = transformer
pipe.to(device)

# Load control models
lora_path = "./models"
control_models = {
    "canny": f"{lora_path}/canny.safetensors",
    "depth": f"{lora_path}/depth.safetensors",
    "hedsketch": f"{lora_path}/hedsketch.safetensors",
    "pose": f"{lora_path}/pose.safetensors",
    "seg": f"{lora_path}/seg.safetensors",
    "inpainting": f"{lora_path}/inpainting.safetensors",
    "subject": f"{lora_path}/subject.safetensors",
}
单一条件控制
# Single spatial condition control example
path = control_models["canny"]
set_single_lora(pipe.transformer, path, lora_weights=[1], cond_size=512)
# Generate image
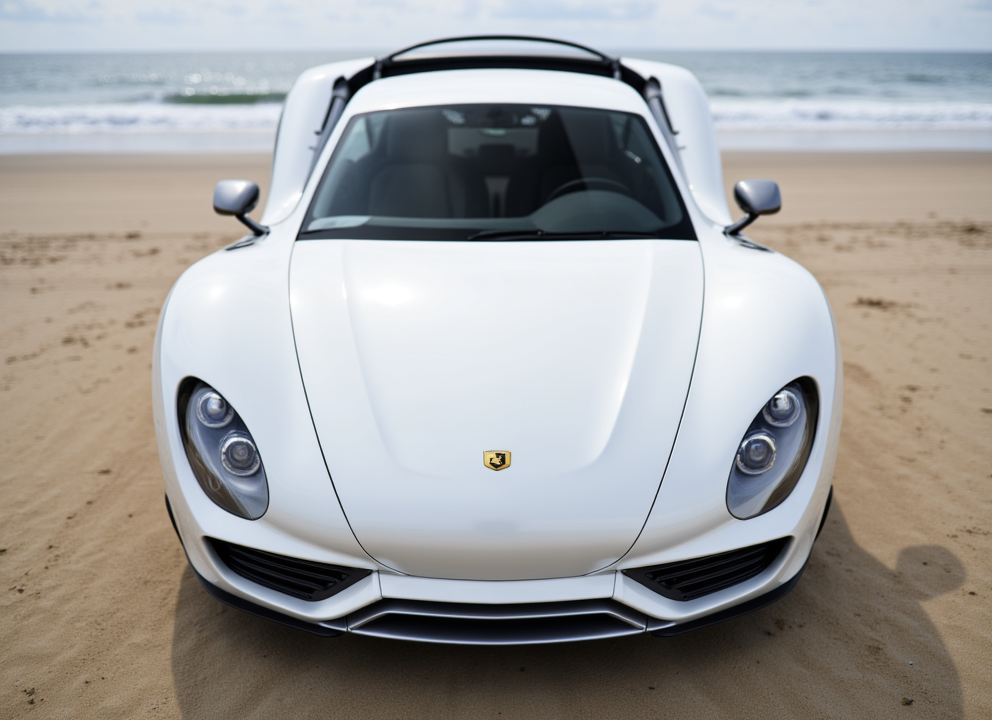
prompt = "A nice car on the beach"
spatial_image = Image.open("./test_imgs/canny.png").convert("RGB")
image = pipe(
prompt,
height=720,
width=992,
guidance_scale=3.5,
num_inference_steps=25,
max_sequence_length=512,
generator=torch.Generator("cpu").manual_seed(5),
spatial_images=[spatial_image],
cond_size=512,
).images[0]
# Clear cache after generation
clear_cache(pipe.transformer)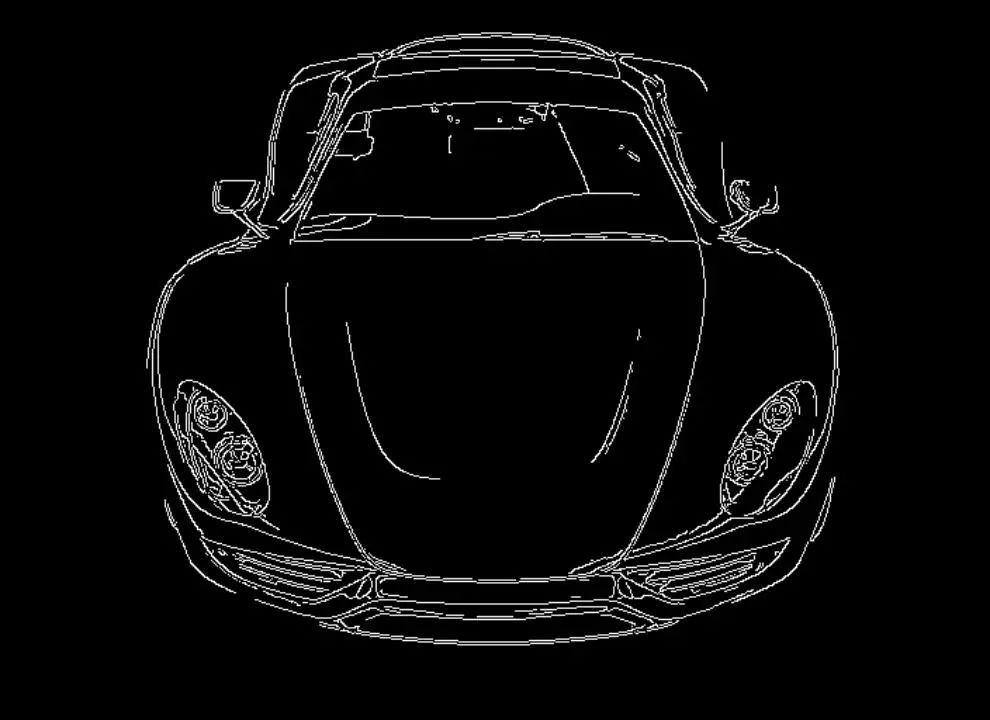
# Single subject condition control example
path = control_models["subject"]
set_single_lora(pipe.transformer, path, lora_weights=[1], cond_size=512)

# Generate image
prompt = "A SKS in the library"
subject_image = Image.open("./test_imgs/subject_0.png").convert("RGB")

image = pipe(
    prompt,
    height=1024,
    width=1024,
    guidance_scale=3.5,
    num_inference_steps=25,
    max_sequence_length=512,
    generator=torch.Generator("cpu").manual_seed(5),
    subject_images=[subject_image],
    cond_size=512,
).images[0]

# Clear cache after generation
clear_cache(pipe.transformer)
多条件控制
# Multi-condition control example
paths = [control_models["subject"], control_models["inpainting"]]
set_multi_lora(pipe.transformer, paths, lora_weights=[[1], [1]], cond_size=512)

prompt = "A SKS on the car"
subject_images = [Image.open("./test_imgs/subject_1.png").convert("RGB")]
spatial_images = [Image.open("./test_imgs/inpainting.png").convert("RGB")]

image = pipe(
    prompt,
    height=1024,
    width=1024,
    guidance_scale=3.5,
    num_inference_steps=25,
    max_sequence_length=512,
    generator=torch.Generator("cpu").manual_seed(42),
    subject_images=subject_images,
    spatial_images=spatial_images,
    cond_size=512,
).images[0]

# Clear cache after generation
clear_cache(pipe.transformer)

使用提示
-
每次生成后使用 clear_cache(pipe.transformer)清理缓存 -
为了获得最佳性能: -
初始建议使用 guidance_scale=3.5,并根据效果调整 -
使用 num_inference_steps=25可在质量与速度间取得良好平衡
-
使用 set_multi_lora 接口时,请确保主体 LoRA 路径(subject)位于空间 LoRA 路径(canny、depth、hedsketch 等)之前。
(文:路过银河AI)