
从Dify v1.0.0-beta.1开始,推出全新的Dify市场,插件代码已经从Dify主干中移除。但是无论如何变化,整体思想就是解耦合,让插件开发更加独立化,插件开发的本质并没有任何变化。本文以 GoogleSearch 为例,介绍如何快速开发一个工具插件。
一.Dify插件开发环境
开发 Dify 插件需要具备2个条件:Dify插件脚手架工具和Python环境。
1.脚手架工具
根据参考文献[2]下载Dify 插件开发脚手架工具dify-plugin-windows-arm64.exe,可重命名为dify-0.0.1.exe。

2.Python版本
官方要求Python≥3.12。
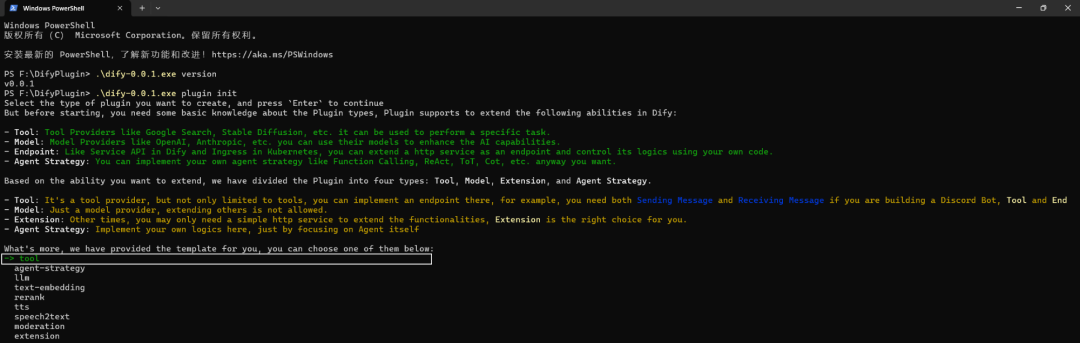
二.创建新项目
执行命令dify-0.0.1.exe plugin init,输入Tool插件的名字、作者和描述,然后选择开发插件的编程语言。目前仅仅支持Python,后续将支持Go。如下所示:

说明:Tool插件名字最好不要带-符号,可以是GoogleSearch,或者google_search。如果使用google-search,那么可能在Python代码中出现包找不到情况。
三.开发工具插件
1.选择插件类型和模板
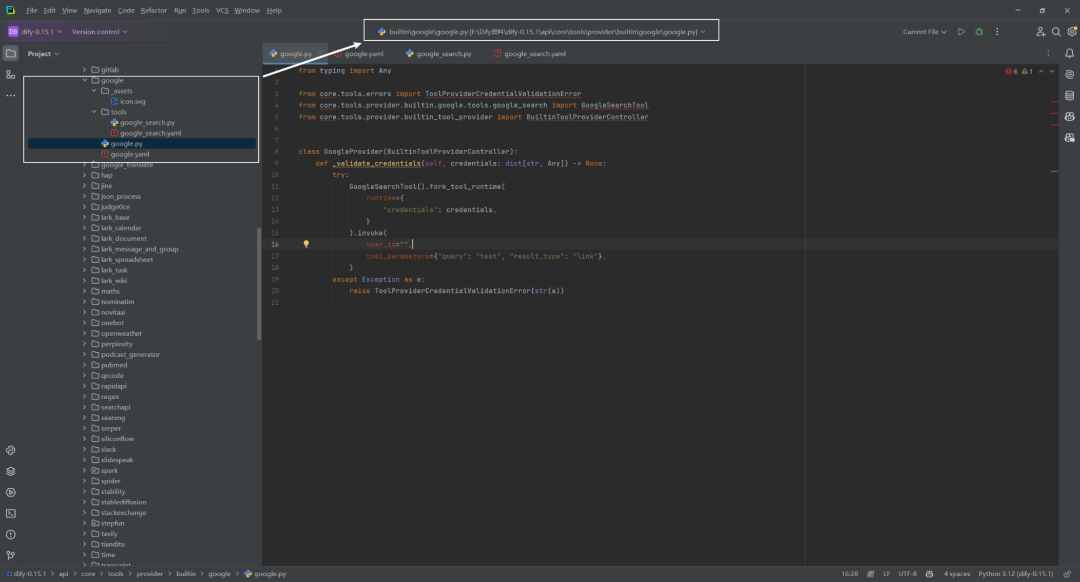
脚手架工具内的所有模板均已提供完整的代码项目[4]。如下所示:
2.配置插件权限
插件还需要读取 Dify 平台的权限才能正常连接。为该示例工具插件授予以下权限:
-
Tools
-
Apps
-
启用持久化储存 Storage,分配默认大小存储
-
允许注册 Endpoint

|
|
|
|
|---|---|---|
|
|
|
|
|
|
|
|
|
|
|
|
|
|
|
|
|
|
|
|
|
|
|
|
|
|
|
|
|
|
|
|
|
|
|
|
|
|
|
|
|
|
|
|
|
|
|
|
四.开发工具插件
Dify插件独立出来前,Dify v0.15.1版本中GoogleSearch插件写法,如下所示:
Dify插件独立出来后,从Dify v1.0.0-beta.1开始,工具插件代码架构,如下所示:

本质上还是通过yaml文件对provider和tools进行描述,通过provider的Python脚本进行凭证验证,而通过tools中的Python脚本执行工具动作。详细代码参考文献[5][6],如下所示:

五.调试插件
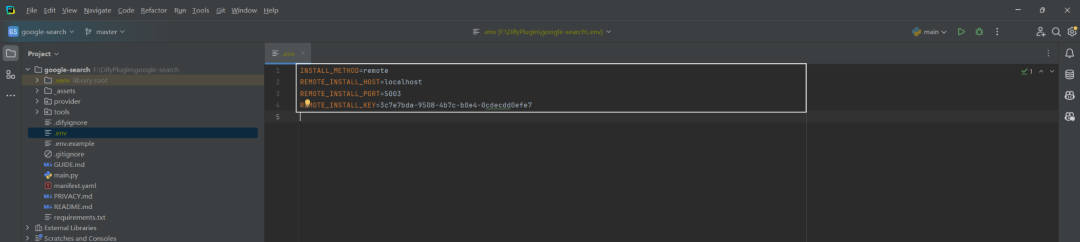
Dify插件开发后,可通过Dify远程调试,前往插件管理页获取调试Key和远程服务器地址。如下所示:

拷贝.env.example文件并重命名为 .env,将获取的远程服务器地址和调试 Key 等信息填入其中。.env文件,如下所示:
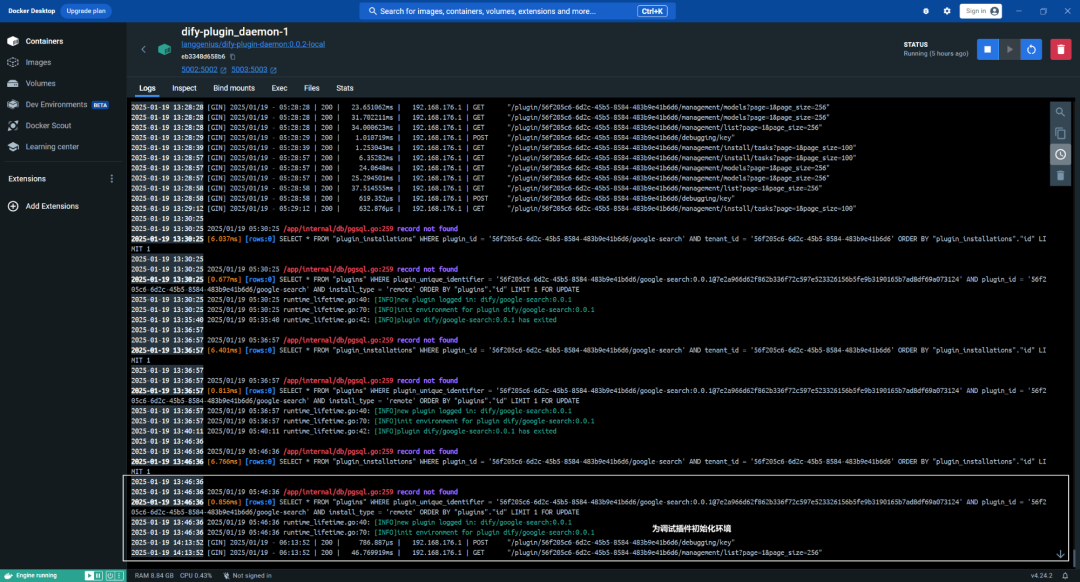
运行python -m main命令启动插件,通过plugin_daemon容器可看到正在为插件初始化环境,如下所示:
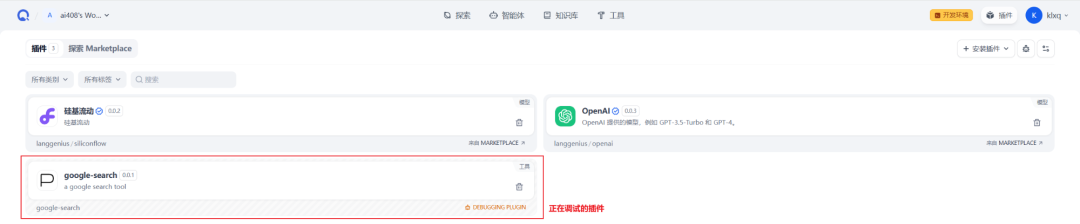
在插件页即可看到该插件已被安装至 Workspace 内,并且有DEBUGGING PLUGIN标识,如下所示:
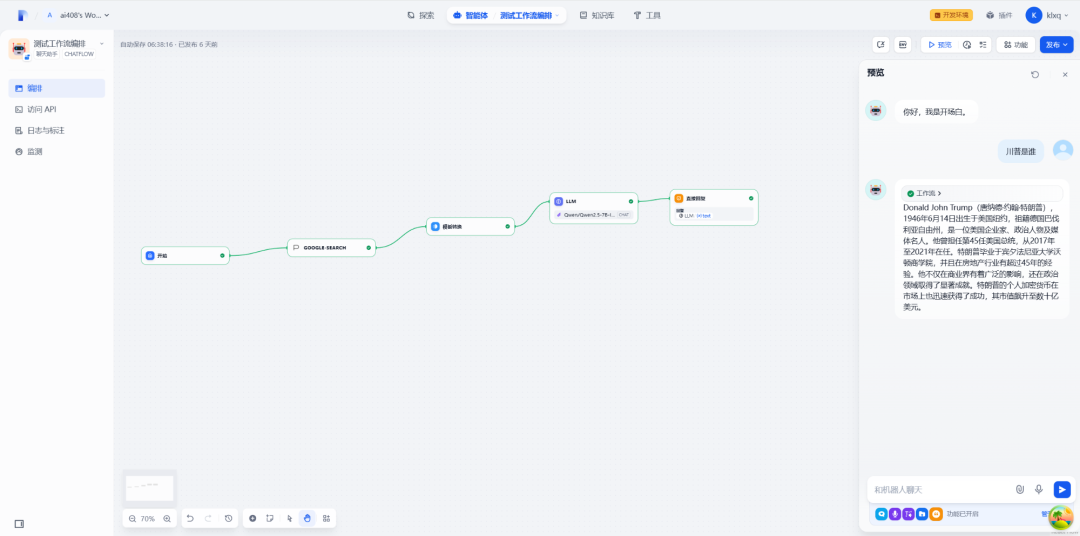
新建一个简单的Chatflow测试流程,对其进行测试,如下所示:
六.打包插件
确认插件能够正常运行后,可通过以下命令行工具打包并命名插件。运行以后可以在当前文件夹发现 google-search.difypkg 文件,该文件为最终的插件包。如下所示:

安装插件方式为本地插件,如下所示:

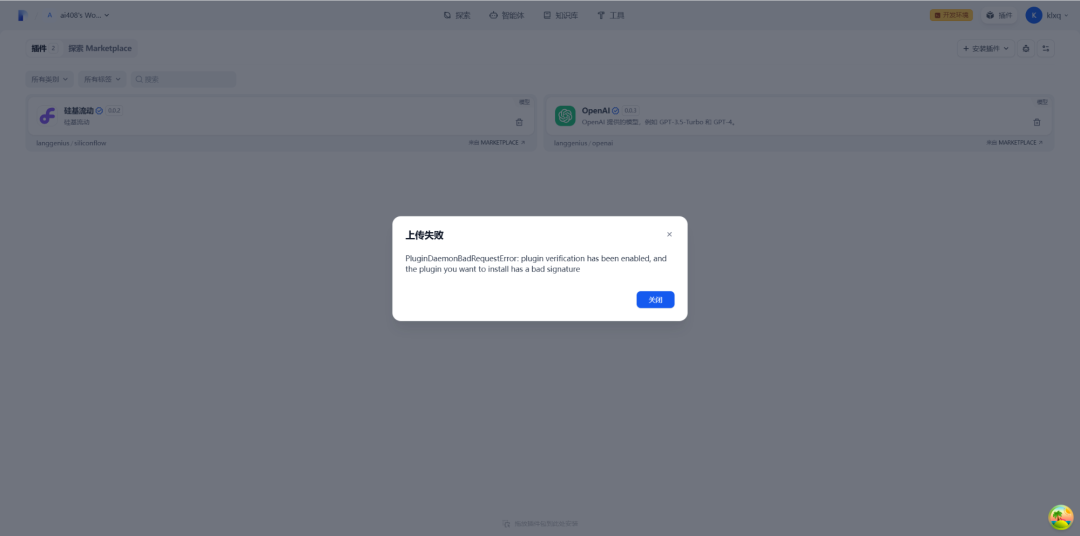
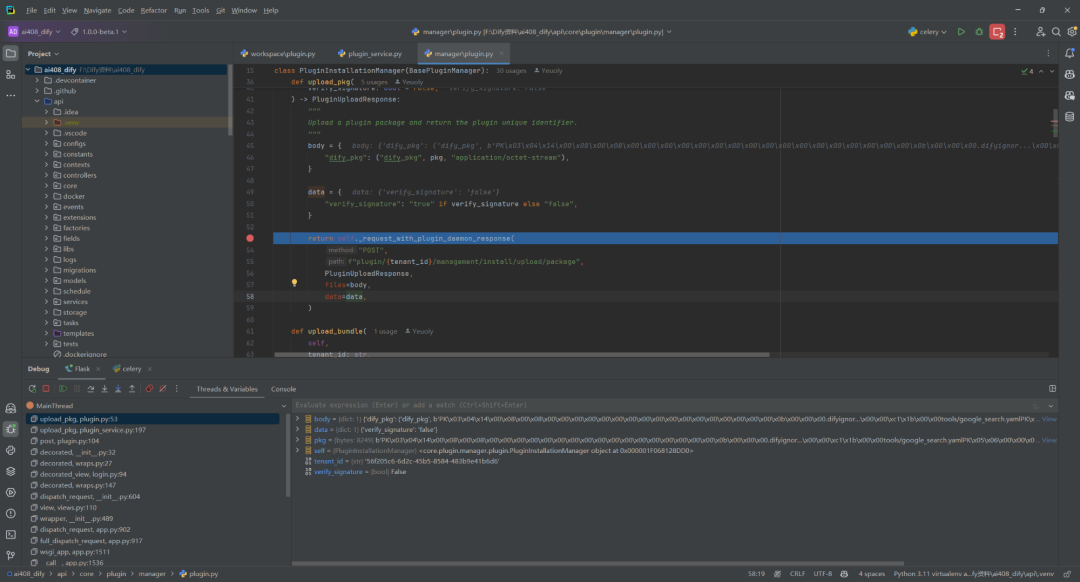
上传失败,提示plugin_daemon容器开启了验证签名,但是该插件验证失败,如下所示:
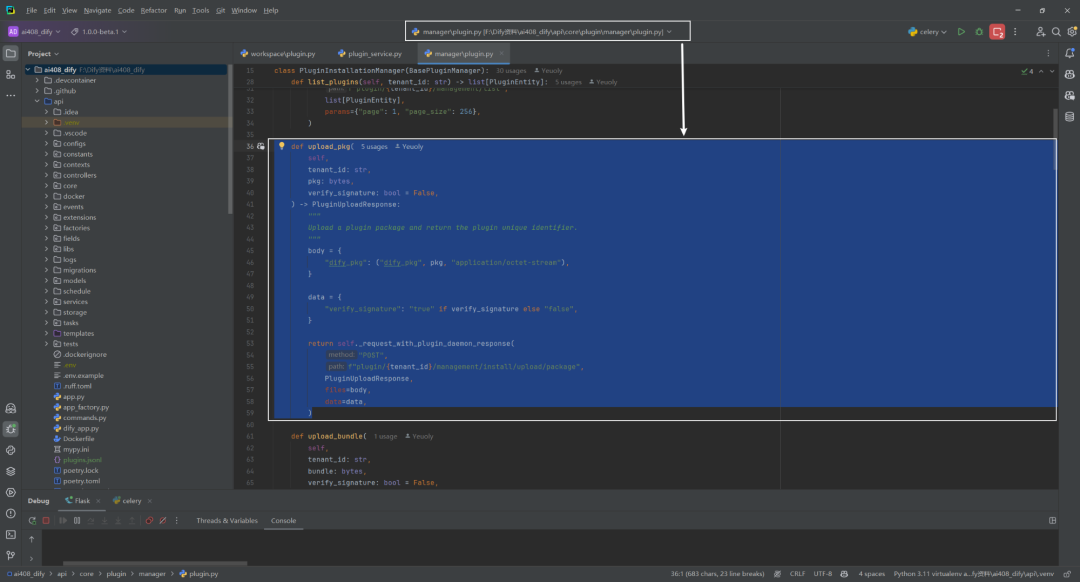
Debug下源码发现verify_signature默认为false,如下所示:
dify-plugin-daemon\.env配置文件中FORCE_VERIFYING_SIGNATURE=true,如下所示:
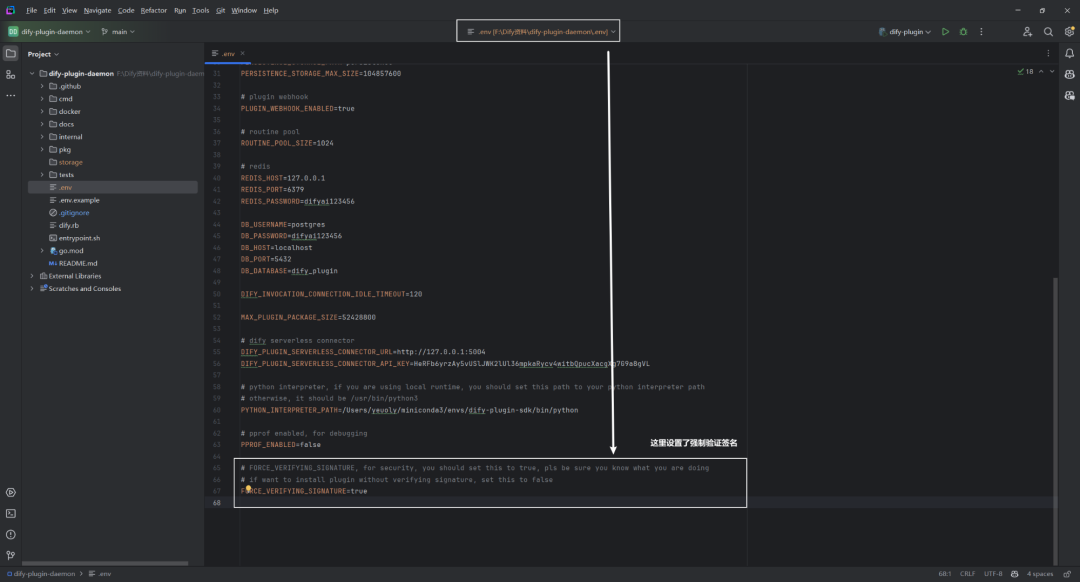
遇到签名问题通常有2个思路,一个是将两者的签名搞一致,另一个是去掉签名。为了简单起见,将plugin_daemon容器签名去掉,即设置FORCE_VERIFYING_SIGNATURE=false,然后重新打镜像。如下所示:
docker build -t langgenius/dify-plugin-daemon:0.0.2-local -f docker/local.dockerfile .
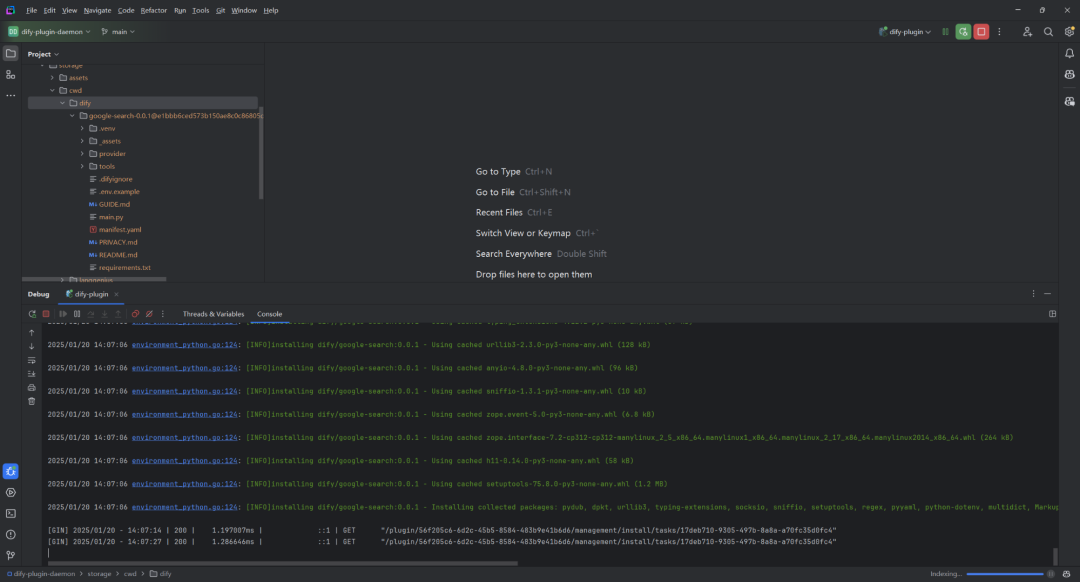
由于通过dify-plugin-daemon源码运行测试的,可看到google-search工具插件安装过程日志,如下所示:
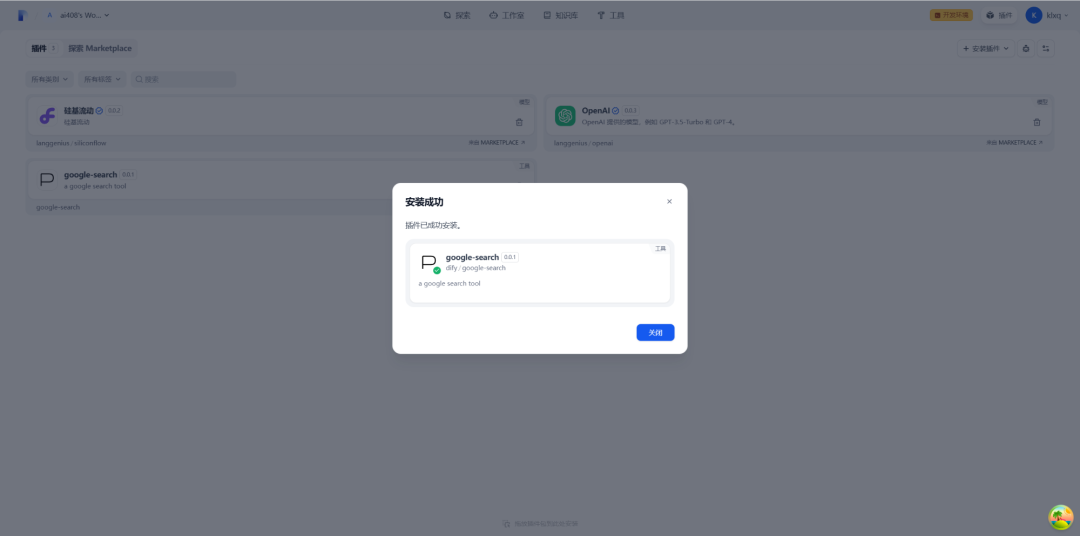
最终google-search工具插件安装成功,并且有LOCAL PLUGIN标识,如下所示:
至此,已完成一个工具类型插件的完整开发、调试、打包和本地安装过程。
参考文献
[1] 初始化开发工具:https://docs.dify.ai/zh-hans/plugins/quick-start/developing-plugins/tool-initialization
[2] https://github.com/langgenius/dify-plugin-daemon/releases
[3] https://serpapi.com/
[4] https://github.com/langgenius/dify-plugin-sdks
[5] https://github.com/langgenius/dify-official-plugins
[6] Tool插件:https://docs.dify.ai/zh-hans/plugins/quick-start/developing-plugins/tool-type-plugin
[7] Dify中的GoogleSearch工具插件开发例子(原文链接):https://z0yrmerhgi8.feishu.cn/wiki/Ib15wh1rSi8mWckvWROckoT2n6g
(文:NLP工程化)