
当我们在用大模型写代码、生成文案、总结知识的时候,你有没有想过:这些模型是怎么“记住”我们想要的上下文的?答案之一,就是最近火出圈的 MCP(Model Context Protocol)协议。
这是一种由 Anthropic 牵头提出的新型“上下文接入协议”,让大模型能像插件一样,接入各种外部信息源——比如 GitHub 项目、Notion 文档、网页内容、数据库记录等等。通过MCP,我们可以将分散在多个平台的数据,实时、安全地“喂”给 LLM,让它不仅能说会道,更能“知情识趣”。
无论你是 AI 初学者、框架控,还是企业开发者,只要你想让大模型“读得懂你自己的数据”,这篇文章就是你的高能指南。
一起来看看,如何用 MCP + Python/TS 框架,开启 AI 应用开发的“外挂模式”。
将 MCP 视为LLMs的第三次进化。
在第一次进化中,我们拥有LLMs,它们能够准确回答用户提示,前提是它们能在训练数据中找到查询。在这个阶段,它们无法对训练数据之外的提示做出有意义的回应,因为它们无法访问外部工具。
在LLMs的第二次进化中,我们为它们提供了额外的上下文(工具),这些工具不易于操作。然而,它们能够帮助LLMs准确预测和回答用户意图。
第三次进化仍然包括LLMs和工具,但我们实施了一个适当的架构,以使它们能够访问外部应用程序,并确保它们易于维护。

在构建 AI 服务时,您的数据可能存储在云端,用于企业环境中回答客户支持票务的 AI 助手应用程序。MCP 是 Anthropic 的一个开源协议,您可以使用它将您的企业数据连接到 AI 系统。
在LLMs和代理的背景下,MCP 帮助他们提供超出内置知识的有意义响应。例如,要求 ChatGPT 向特定的 Slack 频道发送消息、检查您的日历上的可用性,并今天与团队成员安排会议。您会对 ChatGPT 的响应感到失望,因为它无法访问这些应用程序。MCP 的实施有助于这些助手输出有用的结果。

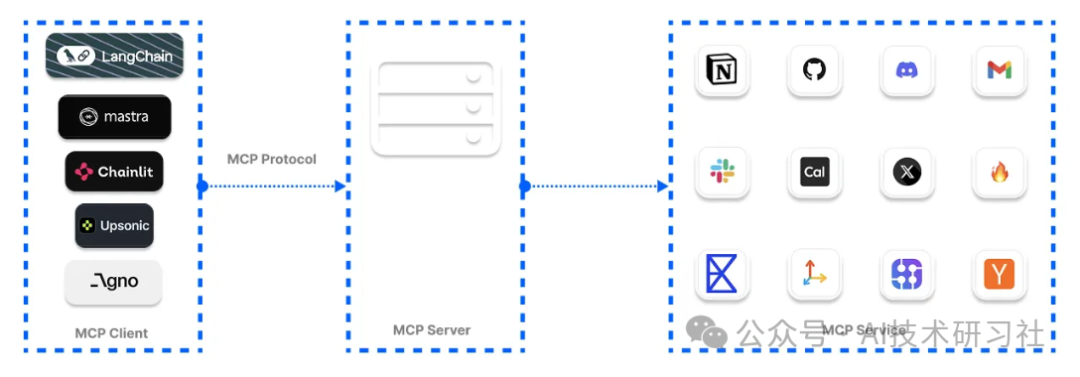
在下图中,我们结合了用于代理系统的工具,并通过 MCP 服务器访问它们,以提供更一致的用户体验。MCP 方法使得通过中央位置管理和保护这些工具变得更加容易。
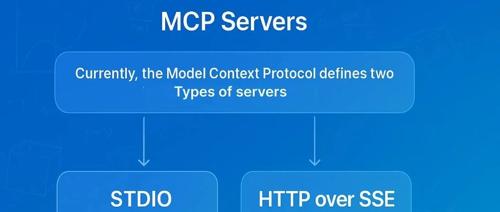
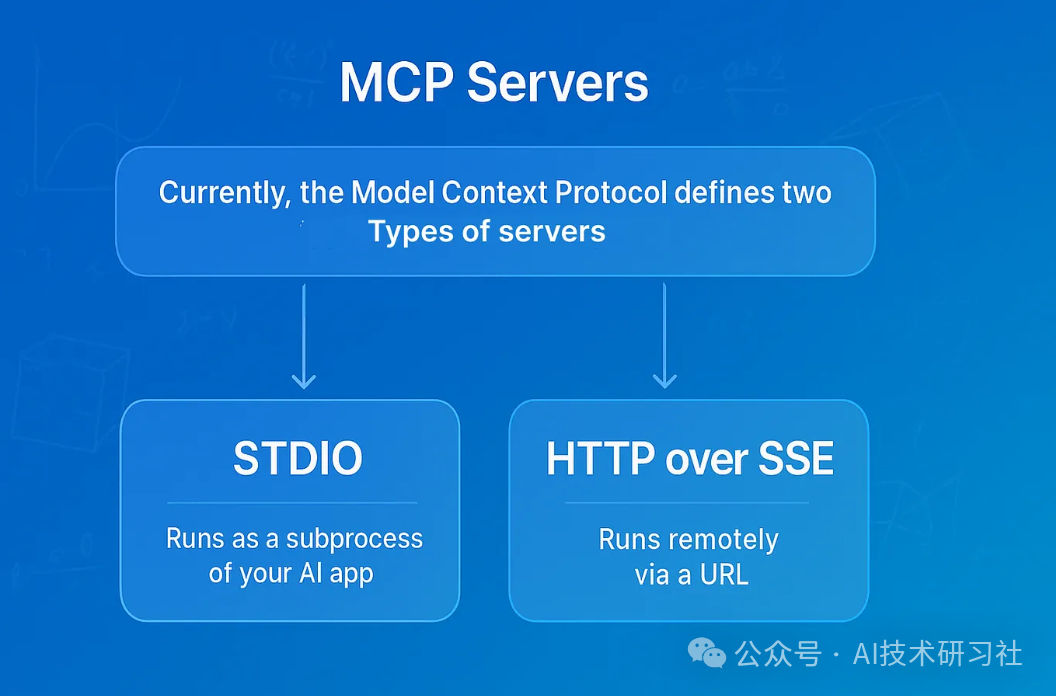
Anthropic 对 MCP 的规范有两种服务器形式,用于向代理和 AI 项目添加工具。这些 MCP 服务器连接类型包括以下内容。
- Server-Sent Events (SSE)
服务器发送事件(SSE):通过 HTTP 连接到远程服务。 - STDIO
标准输入输出(STDIO):允许执行本地命令并通过标准输入输出进行通信。
有多个开源的托管 MCP 工具库,用于增强LLMs和代理以确保它们生成的响应的可靠性。这些托管 MCP 工具库被称为注册库,提供了经过精选的服务集合。您可以使用它们的工具将您的 AI 应用程序连接到以下注册库。您还可以使用不同的服务器类型,例如 uvx ,它由无需安装的 Python 工具组成。还有 Docker 选项用于运行 MCP 工具,以及基于 npx 的服务器,该服务器需要安装 Node.js。
OpenTools 为 MCP 工具提供生成式 API。您可以访问数百个现成的 MCP 工具,以实现您的 AI 项目。使用 OpenTools API,开发者可以扩展LLMs的网页搜索功能,获取实时位置数据,以及进行网页抓取。该 API 支持 Curl、Python 和 TypeScript。访问 OpenTools 快速入门指南以使用 API。
from openai import OpenAI

client = OpenAI(
    base_url="https://api.opentools.com",
    api_key="<OPENTOOLS_API_KEY>"
)

completion = client.chat.completions.create(
    model="anthropic/claude-3.7-sonnet",
    messages=[
        { "role": "user", "content": "Compare specs of top 5 EVs on caranddriver.com" }
    ],
    tools=[{ "type": "mcp", "ref": "firecrawl" }]
)
虽然 MCP 已经成为一个热门词汇,并且最近所有开发者社区都在讨论它,但要知道哪些 MCP 客户端框架用于与 AI 应用和代理集成并不容易。我们进行了研究,并找到了以下领先的 MCP 客户端平台,用于 Python 和 TypeScript 基于代理的工作流程和 AI 助手。
1. 使用 OpenAI 代理 SDK 构建 Git MCP 代理
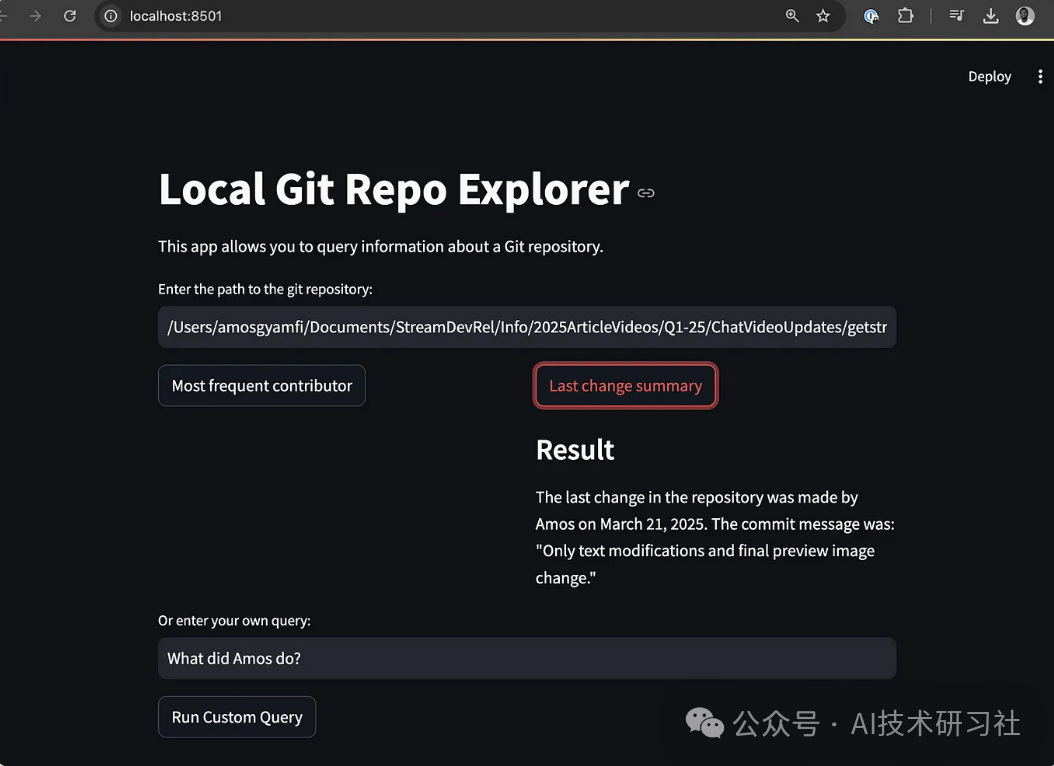
当使用 OpenAI Agents SDK 构建代理时,您可以使用 SDK 的 MCPServerStdio 和 MCPServerSse 类连接到这些社区构建的 MCP 服务器。以下 MCP 代理实现访问您的本地 Git 仓库的根目录,并响应用户对仓库的查询。
import asyncio
import shutil
import streamlit as st
from agents import Agent, Runner, trace
from agents.mcp import MCPServer, MCPServerStdio

asyncdefquery_git_repo(mcp_server: MCPServer, directory_path: str, query: str):
    agent = Agent(
        name="Assistant",
        instructions=f"Answer questions about the localgit repository at {directory_path}, use that for repo_path",
        mcp_servers=[mcp_server],
    )

    with st.spinner(f"Running query: {query}"):
        result = await Runner.run(starting_agent=agent, input=query)
        return result.final_output

asyncdefrun_streamlit_app():
    st.title("Local Git Repo Explorer")
    st.write("This app allows you to query information about a local git repository.")

    directory_path = st.text_input("Enter the path to the git repository:")

    if directory_path:
        # Common queries as buttons
        col1, col2 = st.columns(2)
        with col1:
            if st.button("Most frequent contributor"):
                query = "Who's the most frequent contributor?"
                run_query(directory_path, query)

        with col2:
            if st.button("Last change summary"):
                query = "Summarize the last change in the repository."
                run_query(directory_path, query)

        # Custom query
        custom_query = st.text_input("Or enter your own query:")
        if st.button("Run Custom Query") and custom_query:
            run_query(directory_path, custom_query)

defrun_query(directory_path, query):
    ifnot shutil.which("uvx"):
        st.error("uvx is not installed. Please install it with `pip install uvx`.")
        return

    asyncdefexecute_query():
        asyncwith MCPServerStdio(
            cache_tools_list=True,
            params={
                "command": "python",
                "args": [
                    "-m",
                    "mcp_server_git",
                    "--repository",
                    directory_path
                ]
            },
        ) as server:
            with trace(workflow_name="MCP Git Query"):
                result = await query_git_repo(server, directory_path, query)
                st.markdown("### Result")
                st.write(result)

    asyncio.run(execute_query())

if __name__ == "__main__":
    st.set_page_config(
        page_title="Local Git Repo Explorer",
        page_icon="📊",
        layout="centered"
    )
    # Change from async to synchronous implementation
    # Since Streamlit doesn't work well with asyncio in the main thread

    # Define a synchronous version of our app
    defmain_streamlit_app():
        st.title("Local Git Repo Explorer")
        st.write("This app allows you to query information about a Git repository.")

        directory_path = st.text_input("Enter the path to the git repository:")

        if directory_path:
            # Common queries as buttons
            col1, col2 = st.columns(2)
            with col1:
                if st.button("Most frequent contributor"):
                    query = "Who's the most frequent contributor?"
                    run_query(directory_path, query)

            with col2:
                if st.button("Last change summary"):
                    query = "Summarize the last change in the repository."
                    run_query(directory_path, query)

            # Custom query
            custom_query = st.text_input("Or enter your own query:")
            if st.button("Run Custom Query") and custom_query:
                run_query(directory_path, custom_query)

    # Run the synchronous app
    main_streamlit_app()
上述代码将 Streamlit 与 OpenAI MCP 代理集成,允许您使用 Git MCP 服务器与本地 Git 仓库进行聊天。要运行此示例,您应该安装以下内容。
2. 使用 Praison AI 构建 MCP AI 代理
创建一个 Python 文件,例如,streamlit_praison_airbnb_mcp_agent.py,并在其中填写以下代码。
import streamlit as st
from praisonaiagents import Agent, MCP

st.title("🏠 Airbnb Booking Assistant")

# Create the agent
@st.cache_resource
defget_agent():
    return Agent(
        instructions="""You help book apartments on Airbnb.""",
        llm="gpt-4o-mini",
        tools=MCP("npx -y @openbnb/mcp-server-airbnb --ignore-robots-txt")
    )

# Initialize chat history
if"messages"notin st.session_state:
    st.session_state.messages = []

# Display chat history
for message in st.session_state.messages:
    with st.chat_message(message["role"]):
        st.markdown(message["content"])

# User input form
with st.form("booking_form"):
    st.subheader("Enter your booking details")

    destination = st.text_input("Destination:", "Paris")

    col1, col2 = st.columns(2)
    with col1:
        check_in = st.date_input("Check-in date")
    with col2:
        check_out = st.date_input("Check-out date")

    adults = st.number_input("Number of adults:", min_value=1, max_value=10, value=2)

    submitted = st.form_submit_button("Search for accommodations")

    if submitted:
        search_agent = get_agent()

        # Format the query
        query = f"I want to book an apartment in {destination} from {check_in.strftime('%m/%d/%Y')} to {check_out.strftime('%m/%d/%Y')} for {adults} adults"

        # Add user message to chat history
        st.session_state.messages.append({"role": "user", "content": query})

        # Display user message
        with st.chat_message("user"):
            st.markdown(query)

        # Get response from the agent
        with st.chat_message("assistant"):
            with st.spinner("Searching for accommodations..."):
                response = search_agent.start(query)
                st.markdown(response)

        # Add assistant response to chat history
        st.session_state.messages.append({"role": "assistant", "content": response})

# Allow for follow-up questions
if st.session_state.messages:
    prompt = st.chat_input("Ask a follow-up question about the accommodations")
    if prompt:
        search_agent = get_agent()

        # Add user message to chat history
        st.session_state.messages.append({"role": "user", "content": prompt})

        # Display user message
        with st.chat_message("user"):
            st.markdown(prompt)

        # Get response from the agent
        with st.chat_message("assistant"):
            with st.spinner("Thinking..."):
                response = search_agent.start(prompt)
                st.markdown(response)

        # Add assistant response to chat history
        st.session_state.messages.append({"role": "assistant", "content": response})
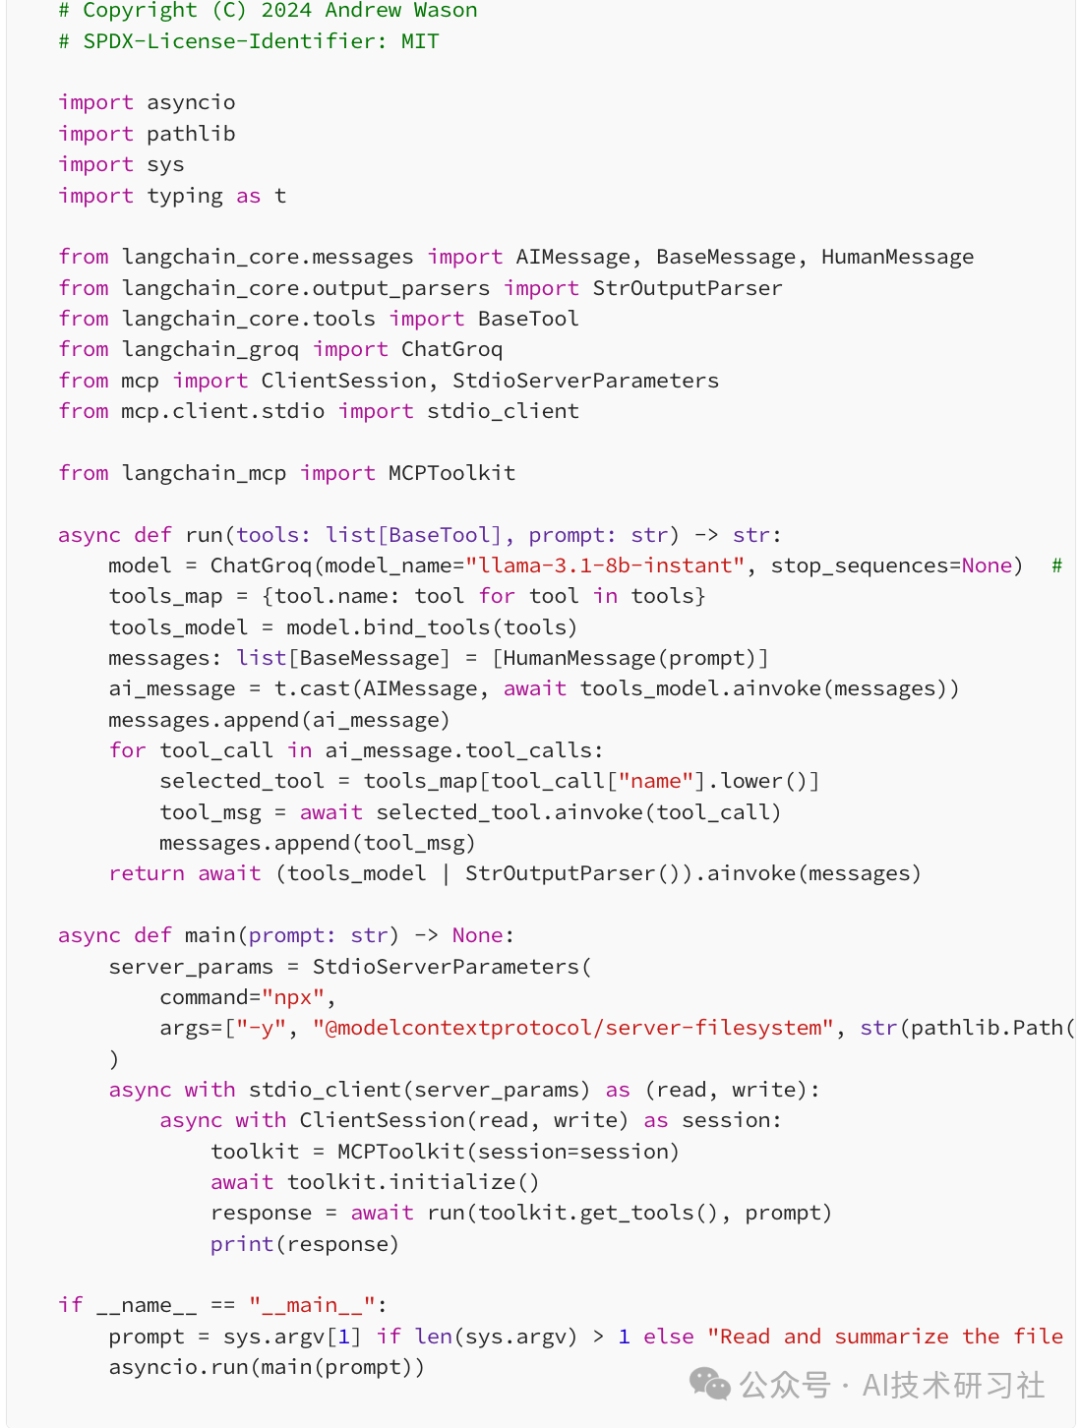
LangChain 支持 MCP 的工具调用。这种支持允许您设置 Python 函数以访问不同的 MCP 服务器,并在 AI 项目中检索工具以执行任务。下面的示例代码连接到安全的 MCP 文件系统服务器,使LLM能够准确回答您提供的任何文件的任何问题。
本教程向您介绍 MCP,并解释了为什么它在开发者社区中变得流行。我们强调了 MCP 与 Cursor 和 Windsurf 等集成开发环境(IDE)的集成。除此之外,我们还将在七个不同的 Python 和 TypeScript 框架中实现 MCP,用于构建基于 LLM 的应用程序、人工智能助手和代理。
MCP 的强大之处也伴随着以下挑战。当您在项目中寻找 MCP 工具时,可能会发现很难检查或验证其质量,以及确定其适用于您的 AI 项目的具体应用。这是因为其工具搜索和发现尚未标准化。此外,由于其服务器提供商的不同架构,其配置无法提供一致的用户体验。
目前,MCP 生态系统正在讨论标准化 MCP 的各个方面。未来可能会有一种标准方式来安装基于 MCP 的应用程序,就像我们在 Python 中安装包一样。PulseMCP 也试图使浏览和发现 MCP 更容易。
参考:https://medium.com/@amosgyamfi/the-top-7-mcp-supported-ai-frameworks-a8e5030c87ab
(文:AI技术研习社)